The Casio Wrist Camera (WQV-1): Absolutely unwilling to share its secrets with a PC

I have gone to extreme lengths to get this thing to talk to a computer and I want to share a bunch of information about this watch with the internet.

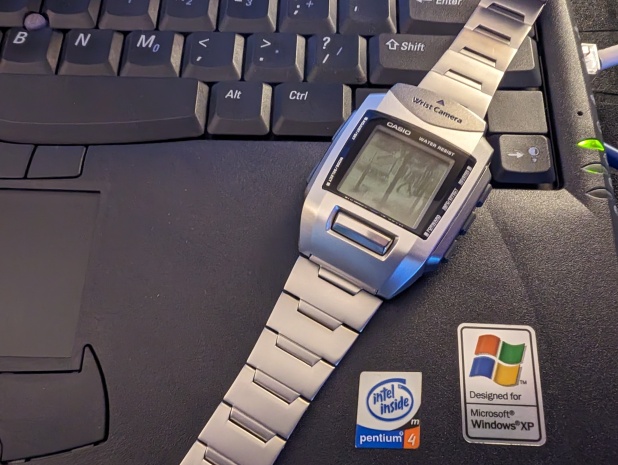
For the unitiated, the Casio Wrist Camera (WQV-1/#2220) is the first watch to contain a digital camera. It was launched in December of 2000.

It shoots images that are 120×120 in grayscale, which is roughly equivilent to a Game Boy Camera. It has 1mb of in-built memory and can store up to 100 images. It communicates with other watches and other devices over Infrared (IRDA) at 115kbps.

The pictures I’ve taken are obviously very low resolution – but at this point it’s more about cracking the nut of this challenge and getting this first gen Casio Wrist Camera to talk using a series of blinking infrared lights.

I’ll cut some of the story but here are the main points:

  • Casio WQV Link 1.0 is still available here. This site implies a Macintosh version also exists but good luck finding that without a disc image of the original software CD (so far I haven’t found that).
  • The Casio WQV-1 manual is here.
  • I started out by using a USB -> IRDA adapter (Kingsun KS-959) and about 6 different flavours of Windows VMs, including Win XP (Standard, SP1, SP2, SP3), Windows 98 SE and Windows 2000. No good. I used various flavours of IRComm2K where required. All of these attempts were unsuccessful, but I could see from a ‘dumb’ visual test (digital camera to see if the IR is blinking) that on a few different configs, Windows WAS attempting to communicate with it on request.
  • It appears that Casio WQV Link 2.0 and 3.0 will not speak with this watch. I assumed that, like most computer software, subsequent versions would speak to the older stuff. I assumed wrong. If you’re trying this with your WQV-1, you’re wasting your time.
  • Regarding the Casio PAD-5 adapter: The WQV Link 2.0 manual says, “use with the Casio WQV-1 Series and WQV-2 Series Wrist Camera is not supported”. This might be helpful info to someone out there.
  • Regarding the Casio PAD-2B adapter: The aforementioned manual says, “Note that you will also need to install particular link software on your computer to perform data communication with a WQV-1 Series or WQV-2 Series Wrist Camera.”. I assume this just means WQV Link 1.0.
  • There is a Palm Pilot version of the software for Palm OS 3.3+, but I couldn’t see an emulator happy to pass through IRDA. I do not have a Palm Pilot.
  • I accidentally restored a Dell Latitude C640 during this project – it has built-in infrared. Dell still provide everything you need to get their old hardware operating. It is now fully functional and I have fully configured versions of Windows XP SP3 and 98SE available on original hardware. The built-in infrared adapter is working and properly configured across both environments.

If you have this original software CD, for the love of god please image it and whack it on Archive.org – then also please let me know.

Some things I know for certain in my case:

  • The laptop hardware infrared is working and configured correctly, and probably optimally configured in Windows 98SE (native COM port mapping support for the software, which also expects Windows 98).
  • The Casio WQV-1 infrared light blinks away (confirmed via camera view) when testing the ‘Other Device’ SEND function, which implies that it would indeed send something. Windows 98, with Infrared set to ‘scan every 3 seconds’ also complains that another device is interupting it when you test this function – so it IS receiving a signal.
  • I have the correct COM port selected in WQV Link 1.0.
  • I have reset the watch by pulling the battery and leaving it off for some time (picture data remains). No change in behaviour.
  • I have followed the various pieces of Casio instructions and the software refuses to find the watch.

If anyone has any suggestions at this point they would be greatly appreciated. At this point I’m starting to suspect there’s a receive issue on the watch side, but I can’t confirm that 100% without another WQV-1 watch or a Palm pilot to test.

The software is just so janky generally speaking that I don’t trust what it says. I’ve tried a hundred different things, and I thought I might finally solve it by creating an operating environment it expects (Windows 98/NT). So far, I have not.

This post will update with further information if I find success.

Further reading, resources and files:

Guide: the unique Playstation SCPH-3500 (NTSC-J), plus some notes on repairs and working with older Playstation models

(I originally posted this write-up to a Reddit thread but figured it could go here too. I have made some minor changes to update it throughout.)

The PSX is old as heck, and I’ve spent way too many hours tinkering with this specific model. Honestly I probably should have given up and thrown a RetroPie together, but I digress.

The SCPH-3500 is worth posting about because it’s a bit of an oddball in the PSX revision timeline, and this model has some specific peculiarities. I’m hoping my knowledge will save someone else many valuable hours.

This unit has the external RCA jacks (no S-Video), Gameshark-friendly port, and often has a PU-8 motherboard (mileage may vary).

Equivalent NTSC-U models: SCPH-1001/1002

The most ‘special feature’ of the SCPH-3500: It has a system BIOS that will only allow NTSC-J discs to play regardless of modchip. Read on to find out more about this quirk and what it means.

I just couldn’t in good conscience take that lid sticker off.

About the laser and drive area

Default laser: KSM-440ACM (short cable)

This thing sucks by proxy of it’s plastic assembly, which is well known for deteriorating due to the orientation of the CD drive unit in this model (it’s close to hot parts of the PSU, which is why it used to get worse the longer the unit was turned on).

Mine was missing a portion of plastic on the spindle which throws off the disc balance. Just throw it out if it’s bung like that and stop wasting your time, it’s a lost cause.

Currently in mine: Modified KSM-440AEM (long cable)

Recommended: a modified 440BAM

I bought a Chinese knockoff 440AEM off eBay for a 900x series which kindly shit itself with a hardware problem not long after I went to the effort. You can snap off the various legs and this unit will fit in a SCPH-3500 (alternatively you can swap the casings). The cable can be neatly coiled.

Adjusting the laser

The SCPH-3500 drive can be adjusted in three ways – the laser ‘intensity’ pot (on the KSM ribbon cable), gain and bias pots. Here is a very good, straightforward guide to adjusting the default laser in one of these units (the 440ACM).

Do not adjust these if you do not have a multimeter at the minimum. 

(Update: in fact, don’t even touch it with a multimeter. Just don’t touch them at all.) Ideally you would have an oscilloscope. When you adjust laser intensity, you should expect to need to adjust the bias, and then the gain. My bias and gain were totally wrong with a 440AEM installed (though they may have simply been wrong in the first place as the OG laser wasn’t reading much either).

Warning: If you do need to adjust the ribbon cable pot, for the love of god mark out where it’s original spot is, or measure the resistance value. Second to that, make the most miniscule adjustments because the intensity pot is extremely sensitive. I’m talking like 1/20 kind of fractional moves.

In addition, the figure old mate quotes in the above article for what your laser should read is specific to the short cable lasers. The long cable lasers often rock 24.4mV (or more for successful CD-R reads).

Honestly these things are a total fucking nightmare and after many many hours, my laser adjustment is still not quite right. I trawled this 13 year old thread that had some extremely useful measurements of various laser units, and tried to find my own using just a multimeter (I do not yet have an oscilloscope). (Update: Here is a very good translated guide to the CD units in Playstations)

My current stats for the 440AEM: Intensity pot – 0.28mV, Bias pot – 1.70V, Gain pot (measured while reading) – 1.82V. All discs, including pressed audio discs will play well, but eventually stutter/seek regardless of anything I do. CD-R game burns suffer the same fate as pressed, but otherwise load and play properly (always use good brands like Verbatim; burn speed hasn’t made much difference for me).

It’s current state is the best I’ve ever had it, and that was after following the adjustment guide linked above, but it’s performance really still isn’t up to scratch. This could honestly be down to a shitty Chinese laser, but I can’t confirm this as all my other spare original units are dead at this stage.

About the internal power supply

As a bog standard Japanese unit, this thing has a 7-pin 100v PSU. I live in Australia so we roll with 240v. I had no interest in buying a stepdown, and the previously mentioned SCPH-900x that shit itself turned out to have a 5-pin 240v PSU. The 5-pin supplies are more commonly found in SCPH-5xxx and newer.

5-pin units can be modified to work with these 7-pin consoles without issue. The rest of the advice on the internet is wrong. I’ve been abusing this unit with constant on/off and resets for many hours now with no issues. Just hack the ends off each connector and wire it up using the following instructions:

(Update: I have been suffering sporadic resets since I wrote this article, but I am still attributing that to the bad laser overdrawing power struggling to read – mileage may vary)

Disclaimer: If you fuck this up or burn your house down because of your inexperience with soldering and shrink-wrapping, it is not my fault. Do not approach this like a ghetto car stereo installation by twisting shit together.

Pinouts:

7-pin units

7 – Purple (RESET) (3.5V – Ground to reset console)

6 – Blue (Ground)

5 – White (3.5V)

4 – Yellow (Ground)

3 – Orange (3.5V)

2 – Red (Ground)

1 – Brown (8V)

Hack off one end of the 7-pin cable. Connect and solder all 3 ground wires together (6/4/2). Connect and solder the 3.5v lines together (5/3).

5-pin units

5 – White (RESET) (3.5V – Ground to reset console)

4 – Yellow (Ground)

3 – Orange (3.5V)

2 – Red (Ground)

1 – Brown (8V)

Hack off one end of the 5-pin cable. Connect and solder the 2 ground wires together (4/2).

Join the things to where they obviously go and make sure you properly insulate the lot. My power supply had 2 ferrite cores attached so make sure you retain those as well when you’re wiring it all together.

Modchips

The Japan-exclusive SCPH-3500 is really similar to the 100x NTSC-U units, but it is not those for one important reason: the NTSC-J bootroom on the PU-8 board has a hard region lock that no modchip bypasses. It will not boot any other region game. Ever.

This is important for a couple of reasons: modchips will appear to be incorrectly installed because games (original or burnt) with the wrong region flag will just spin continuously between 1x and 2x speed without going any further than the system menu. You will need to modify each non NTSC-J game image to appear as NTSC-J, or only buy NTSC-J imports.

The most commonly used tool is called “Patch It”, and it works just fine.

But I’ve already burnt a bunch of NTSC-U games and I’m not doing it again: That’s fine, just patch a Gameshark image to NTSC-J using Patch It, and burn that. Load it first everytime you want to play a perfectly good NTSC-U disc and then swap the game out. Either that or buy some other Playstation console revision.

Chip notes: As per the SCPH-100x models, the MM3 modchip is not the recommended chip for this unit.

The recommended hex is the older Stealth 2.8a. I ignored this (mostly because I didn’t know about the SCPH-3500 quirks at that stage), and installed an NTSC-J flashed MM3 3.1 anyway, using this guide over here. A symptom of the wrong hex being on your 508a is constant booting to the “Insert a Playstation disc” screen. I recommend installing the optional 0.1uF coupling capacitor between pin 8 and 1 (VCC and ground) on the modchip as well.

Here is an extremely useful zip of all the PSX modchip hexs with installation pictures and hex files as hosted on Archive.org

Important side note: MM3 12C508A chips suffer from a well known issue where the signal becomes out of sync with the drive, causing all sorts of annoying shit to happen. Symptoms I found – disc ‘runaway’ where the drive will just spin into another dimension; irratic reading sounds; hangs on the black Playstation logo.

Best way to fix: Just let the system boot into the menu, and close the lid to load the game. 9/10 success rates will follow.

Also important to note for PAL-region folk who might end up with one of these

  • This unit does not have circuitry for displaying PAL, and while it might load your original PAL games it will do so only showing you a blank screen. There is some stuff online about modding for it, but who gives a shit – the Playstation Classic happily reminded everyone why PAL releases were awful. Update: For people with RGB setups, it won’t output any PAL equivalent signal there either.

The path ahead to finalize and finally sort out disc read issues:

  • An oscilloscope
  • Attempting a Stealth 2.8a install instead because I do have a spare 508A sitting around. Honestly from my experience with trying the MM3, it just seems to like fucking things up regardless of what you do sometimes. Calibrating a PSX to read discs is really difficult when one of these is in the loop. Probably most ideal to have the discs sorted before installing the modchip.
  • Buying yet another laser: most online seem to recommend the 440BAM units that were in the PsOne (these need slight modification to fit).

Hope my trials and tribulations with this help someone else!